Fertilizer can help the plants in your home garden grow strong and improve production. If you're looking for an endless supply of compost, start vermicomposting. (h/t to HomesteadSurvivalsite.com)
What is vermicomposting?
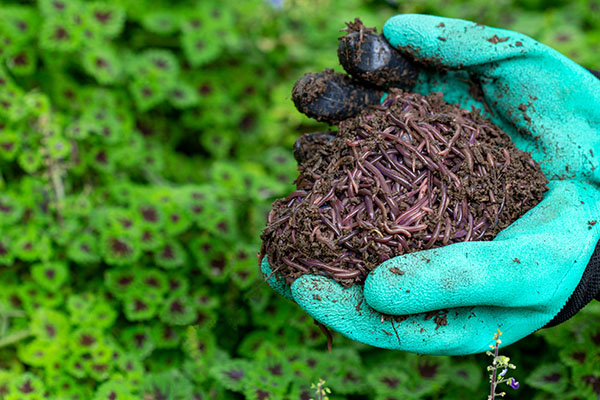
Vermicomposting is a form of composting that uses worms, usually red wigglers, white worms and earthworms, to help break down organic matter. Unlike traditional fertilizers, the worm castings or organic matter processed by the worms will provide nutrients to your plants without burning the roots.
The two main vermicompost systems are tray-based and continuous flow.
The tray system has multiple containers stacked on top of each other. You add food to the top tray until it is full, then switch to the next one until all containers are done. Meanwhile, the continuous flow system is a single container or bag and you add food to the top.
After the process is done, you can remove castings from the vermicomposting bin and add them to your crops. Using vermicompost can help improve yields and boost plant health.
When SHTF, you can use vermicomposting to produce an endless supply of fertilizer for your garden.
Additionally, vermicomposting accelerates the composting process. A traditional compost heap can take as long as several months or longer before vegetation will decompose.
With vermicomposting, worms significantly hasten the process to produce one of the best organic fertilizers you can use in your garden. Vermicomposting can also help you save money since you won't need to buy commercial fertilizers anymore.
Vermicomposting basics
Some people believe that large night crawlers are the best choice for vermicomposting, but red wrigglers are the better choice. The smaller earthworms are sometimes called red wigglers (Eisenia fetida) or redworms (Lumbricus rubellus).
Night crawlers need soil and they also produce dirt.
Note that red wigglers and red worms are different. These two species are great worms for vermicomposting because they prefer a compost environment instead of plain soil and they are easy to keep.
Worms that feed on vegetable waste, compost and organic bedding produce richer castings than worms that feed on plain soil like night crawlers. While night crawlers are great at aerating the soil, they don't add much nutrient value to fertilizer. It's best to use redworms and red wigglers.
To get started immediately, buy your worms from an online retailer. Otherwise, it may take you a while to harvest worms from the soil around your location. Harvested worms will eventually reproduce, but buying them in bulk online is ideal if you want to start without waiting too long. (Related: Home gardening basics: Why you should start making DIY fertilizer for your garden.)
Standard vermicomposting designs and containers
You can use different shapes and materials for vermicomposting. You can also personalize the setup based on your preferences.
Below are some standard vermicomposting designs:
- A 5-gallon Bucket with a lid is easy to set up. You can place it under a sink or on a patio.
- A plastic bin with a lid is the easiest to do, but the material must be opaque, not clear.
- A Styrofoam box can be acquired from grocers, pet supply stores, or online stores. This option is ideal for temperature management.
- A wooden box with a lid can be customized depending on your preferred size.
- Lastly, you can buy a specially manufactured vermicomposter. This option can be expensive but it is well-designed. It may also come in a kit for vermicomposting.
All of these options will work for vermicomposting as long as your stay true to the basic design concept.
The recommended standard vermicomposting bin size is usually 18 inches wide, 24 inches long and 18 inches deep. You can use larger or smaller sizes depending on your available space.
Vermicomposter design concept
There are five important factors for a successful vermicomposter design:
- A container that can hold the worm bedding and composted material.
- A lid or other cover like burlap to maintain moisture and prevent fruit flies or other insects from getting into the vermicomposter.
- Properly placed holes to drain excess water and for air circulation.
- Pieces or sections of screening material over air-circulation holes. This will prevent fruit flies or other insects from entering and compromising the vermicomposter.
- Air space under the container to allow for effective drainage and air circulation. This also helps prevent the worms from escaping through the drainage holes.
Accomplish these design parameters for consistent success regardless of what materials you choose for your vermicomposter.
How does vermicomposting work?
For vermicomposting to work, you must create a comfortable and healthy environment for a worm population and regularly feed them compost materials like vegetation.
On average, one pound of worms can convert a pound of vegetation into a pound of composted worm castings every day. This means you must consistently add vegetation to the vermicomposter if you want a regular supply of vermicompost.
Kitchen scraps are great if you need worm food. You can use the following for your vermicomposter:
- Banana peels or the peelings from non-citrus fruits and vegetables like apples, carrots, cucumbers, melons and squash.
- Trimmings from leafy vegetables.
- Root ends and leaves from broccoli, cabbage, cauliflower or other large stemmed vegetables.
Always chop up the vegetable trimmings to a coarse dice before adding them to the vermicomposter. This makes it easier for the worms to eat and digest them. Chopping the trimmings also helps accelerate the overall composting process.
However, not all kitchen scraps will work in a vermicomposter. Some will inhibit the overall composting process, cause bad odors or kill the worms.
You can also feed the worms leaves and vegetation from your yard or garden. Just cut them up and don't add any vegetation treated with lawn chemicals, pesticides, herbicides or other chemicals. These chemicals will also inhibit the overall composting process and kill worms.
Try to create a diverse combination of vegetable, fruit and vegetation trimmings for best results.
Harvesting worm castings
Once the composting is done, you can finally harvest the worm castings.
Follow these tips to make sure you only harvest the castings and not the undecomposed vegetation and newspaper or worms:
- It's time to harvest the casting once there is an over-abundance of castings in the vermicomposter.
- Start by harvesting the side of the vermicomposter that looks like it has the most worm castings with the least amount of undigested vegetation.
- Next, take a few handfuls of castings and form them into a cone-shaped pyramid on a board or tarp.
- Make as many pyramids as you can harvest. The mounds should be at least four to five inches high.
- Set the pyramids aside for at least 30 minutes. Choose a well-lit area that is shaded from the sun.
- After 30 minutes, any worms caught in the little pyramids will have migrated down and towards the center of the cone to evade the light.
- Grab and cup the worm-free castings from the top and base of the pyramid, then fill your worm casting bucket. If you find a worm or two, put them back in the vermicomposter.
- If you find a lot of undigested newspaper or vegetation, put it back in the vermicomposter or try scooping castings from a different area. Another option is to screen out large bits of newspaper and vegetation. If you don't want to make a mess, wait until you have a good bin of castings.
Vermicomposting is considered safe as long you make your vermicomposter an ideal environment for worms, not fungus or bacteria.
How to use vermicompost
Here are some of the many ways you can use vermicompost in your home garden:
- Sprinkle vermicompost on the top of the soil to help nutrients work their way down to the roots of the plant.
- If you have a new plant, mix vermicompost with regular topsoil. This requires more compost, but it is great when you're potting plants.
- When you have seeds, combine vermicompost with the seed starting mix to help the seedlings grow.
- Brew the vermicompost to make "tea," then spray the liquid fertilizer on your plants to protect them from airborne diseases.
For best results, moderate temperatures, add moisture and feed the worms properly so you have an endless supply of plant-enriching organic fertilizer for your home garden.
Watch the video below to learn more about vermicomposting.
This video is from the A Wizard's Workshoppe channel on Brighteon.com.
More related stories:
Home gardening tips: A beginner’s guide to composting.
Homesteading done right: Chicken droppings composting guide.
Soils are healthier when they are treated with organic fertilizer: Study.
Sources include:
Please contact us for more information.


