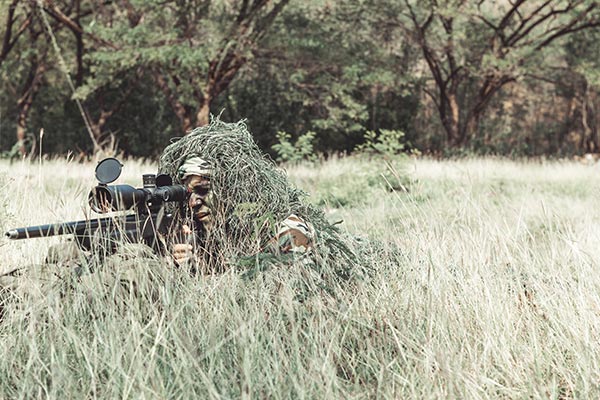
In an SHTF situation, it's crucial to stay hidden. One of the most effective ways to do so is to use a ghillie suit.
A ghillie suit is a camouflage garment that is meant to look like your surroundings. For example, in a forest, the ghillie suit would have a dark green tint and is made to look like foliage. In a dessert, it would have a brown and orange tint.
This item is useful in multiple scenarios, whether you're out for a hunt or escaping danger. There are ghillie suits available in stores, but they are usually quite expensive. If you want to save money or modify your own ghillie suit, it's best to make one yourself. It will also serve as practice in case you need to make a ghillie suit out in the wild. (h/t to ThePreppingGuide.com)
1. Consider your surroundings
Whether it's buying or making a ghillie suit, you have to consider where you're going to use it. A ghillie suit is meant to blend in with the surroundings. A suit that works in the forest will stand out in the desert.
Go check the area and take pictures of the foliage and surroundings. Make notes on the colors you need and be particular about the texture. Check which plants are present.
It's important to get the colors right. If you have been to the area many times, recall how the colors change as the day passes.
2. Gather the materials needed
You can customize the ghillie suit as much as you like. It's possible to add scraps like plastic or hay if the location requires it. Still, there are some items that you need to have on hand, including:
- Turkey vest or old camouflage BDU uniform jacket
- Poly-cord craft netting or camouflage netting
- Heavy-duty sewing needle
- Jute, burlap, thick twine, etc.
- Zip ties, safety pins, or rubber bands
- Braided or fused super line (which can carry at least 15 pounds)
- Paints and dye
- Shoe glue
3. Making the ghillie suit
After gathering all your supplies and references, it's time to put together the ghillie suit. Follow the steps below:
- Use the turkey vest or BDU jacket as the base. It's best to have another person wear the jacket as you drape the netting over it. Create a poncho-like shape from the netting. Allot space for the arms and a hood if you prefer.
- Using the fused super line and needle, sew the netting unto the sleeves and front of the jacket. Leave six to eight inches between the strips. Afterward, seal the stitches with shoe glue. Let it dry.
- Paint what you need to paint. In case some of the materials are not the right color, take this time to paint them. Paint in random strokes to make it look more natural. Make sure to check your references.
- Prepare the burlap. Unravel the burlap and separate them into individual strands. Cut them into varying lengths. Longer strands go on the sleeves and the shorter ones are placed at the back. This process takes a lot of time, but it creates the texture you want in a ghillie suit.
- Tie the jute, twine, or burlap into the suit. It's best to start from the bottom and work your way upward. Make sure that the burlap overlaps with each other.
- After tying these, fluff up the ghillie suit or have someone try it on. Check out if there are bald spots where you need to add more burlap.
- Depending on your location, you can add items like twigs or small branches to your ghillie suit. Don't add items that are too heavy. Always consider the limit of your ghillie suit.
Ghillie suits take a lot of time to make, but the result is worth it. With a basic understanding of how to make one, think outside the box and think of other ways you can customize your ghillie suit. (Related: Survival scavenging: 10 Items you can re-purpose when SHTF.)
Find out more about preparing and making your own materials in case of a disaster at SurvivalGear.news.
Sources include:
Please contact us for more information.


